Friday, October 28, 2011

Tried and True Pot Roast

I am trying something different with this blog post and am not including a picture. Most everyone knows what a pot roast looks like and since they really don't photograph well anyway I thought I would just share a couple of really good recipes and forego the pic.

I don't know about other parts of the country, but when I was growing up in the South pot roast was the typical Sunday afternoon meal. It was an easy meal to prepare. My mom would let the roast cook along with some potatoes, carrots, and onions either in the oven or in the Crockpot while we were at church. Then we would arrive home to a delicious home cooked meal. Add a salad and rolls and you have a balanced meal.

My guys love meat and especially roast. What is it with men and meat? Maybe it goes back to the hunter gather thing where the guys went out hunted and killed something to bring home for dinner. That must be why most men I know love meat and don't consider they have eaten a meal unless there is meat included.

For years I was confused about what cut of meat to buy when cooking a roast. I found this info on a food blog and thought I would share.

What cut of meat should I buy for my roast beef?


A: Every cut varies in flavor and tenderness. Rib roasts and loins are naturally tender and flavorful. Chuck roasts are juicy due to their good marbling, but require lower, slower cooking to get tender. Rump and round roasts are very lean and if thinly sliced can make excellent sandwiches, but they can be tough. Only the top grades of round and rump have enough fat to roast well; many do better if braised, pot roasted or stewed. For a round roast, you want top round. Eye of the round LOOKS like a good roast, but is tough and needs moist heat; bottom round is also pretty chewy when roasted.

I have always had good luck with all cuts of roasts as long as the meat is cooked long enough to make it tender.

Here are a couple of our favorite roast recipes.

Family Favorite Pot Roast

2 lb. roast

1 pkg. Lipton beefy onion soup mix

1 can cream of mushroom soup

1/2 cup water

Mix soups and water; pour over beef. Cook at 300 for four hours or in Crockpot on low for7-9 hours. Add potatoes, carrots, and onions halfway through cooking time.

This is a recipe I recently discovered from www.food.com

To Die for Crock Pot Roast

1 (4-5 lb) beef roast, any kind

1 pkg. brown gravy mix

1 pkg. Italian salad dressing mix

1 pkg. Ranch dressing mix

1/2 cup water

Place pot roast in Crockpot. Mix the dried mixes together in a bowl and sprinkle over the roast. Pour the water around the roast. Cook on low for 7-9 hours.


Buon Appetito!


Monday, October 24, 2011

Spooky Treats-Repost

This is a repost from last Halloween. These treats were fun to make and super easy. The kids loved them!


My son Collin talked me into hosting a costume party for his friends. I really didn't mind doing it, and of course I enjoyed making the treats. I know one day he will be grown so I better enjoy it while I can.

I googled Halloween treats and found several cute ideas.

Eyeball Fondant Cupcakes
I had some white fondant circles that I had made awhile back (thankfully fondant lasts a long time) so I used them to make toppers for cupcakes. I used M&Ms for the pupil and red icing in a tube for the veins.


Nutter Butter Ghost Cookies
These little guys gave me some trouble, but they were so worth it. They are just Nutter Butter cookies dipped in white chocolate. Last night I tried to make them and attempted to melt the white chocolate chips in the microwave, and I scorched the chocolate. Since it was about 11:00 pm and I couldn't go to the store, I tried to make icing to dip them in, but that didn't work either. So today I went to the store and got more white chocolate chips. This time I used a double broiler to melt the chocolate. I had to add about a 1/2 cup Crisco to 2 (12 oz) bags of white chocolate to get it liquid enough so I could dip the cookies. It took me a few tries to get the hang of it, but figured out that the best way to dip them is to submerge them in the white chocolate, and then scoop them out with a fork tapping it on the side of the pan to allow the excess chocolate to drip off. For the eyes, I used mini chocolate chips and pinched off the tip and placed them tip side down.


Witches Fingers

These witches' fingers are too easy. It is simply mozzarella cheese sticks with sliced almonds on the end. I cut a little of the cheese off before placing the almond on, and then put slits in the cheese for knuckles.


Hot Dog Mummies

My sweet friend Christy made these hot dog mummies. They are hot dogs wrapped in crescent rolls with dots of mustard for the eyes. They are too cute and really good too!!


Frozen Hand Punch

I looked for a Halloween punch, but most of the recipes called for dry ice. Since we can't get dry ice here that wasn't an option. I found this idea for frozen hand punch and knew that is what I wanted to make. I was really easy to do.

I filled a rubber glove with a mixer of water and grape juice and closed the glove with a rubber band then put in the freezer. The punch was orange cream sherbet and ginger ale. Just combine any flavor sherbet and ginger ale. Remove glove from frozen hand and place in punch. 


The Spread


Hope you have a funfilled weekend!!

Friday, October 21, 2011

Ultimate S'mores Cake

I have said before that I am not a great cook, but I am a good recipe finder.  This recipe is an example of that.  This cake is so good and totally over the top!  

At our local Navy-Marine Corps Relief Society office where I volunteer, we often have themed potlucks.  This month one of our creative volunteers suggested we do a Choctober theme and have everyone bring, you guessed it, chocolate treats.  We had a great turnout which I am sure was mostly due to the chocolate.  I really hadn't thought too much about what I was going to bake for the potluck, but as I was browsing www.pinterest.com I saw this pic from http://www.fatgirltrappedinaskinnybody.blogspot.com/.

photo from: www.fatgirltrappedinaskinnybody.blogspot.com

I immediately knew I wanted to make this cake for the potluck.  I was not familiar with this blog, but after browsing for a bit I discovered that she has really good recipes and stories, plus she claims to be a Christ follower which I love as well.  This edible masterpiece is a compilation of many of her favorite recipes.

The cake has seven layers.  Two layers each of brownie, chocolate chip cookie, and cheesecake, a layer of graham crackers in the middle with marshmallow frosting smothered between the layers then coated with a rich, decadent chocolate frosting.  I will be honest, as I was making this cake I had my doubts if it would be any good.  All the layers individually are great, but I wasn't so sure they would be good mixed together.  I don't know why I doubted but I did.

I started baking on Monday evening.  The recipe calls for a made-from-scratch brownie recipe, but I used a Duncan Hines box brownie mix instead.  The second layer was the chocolate chip cookie. I used my favorite chocolate chip cookie recipe that can be found here.  On Tuesday evening I baked the two layers of cheesecake using Fat Girl's recipe.  I also used her marshmallow and chocolate icing recipe.  The assembly wasn't too difficult.  I just followed the instructions, and it came together quite nicely.  I probably don't even need to say this, but it is essential that your pans are all the same size or your cake will turn out catawampus.  Make sure not to bake the cookie too long.  I think I left mine in a couple of minutes too long which made it a little difficult to cut.

As I said before, this cake is definitely over the top.  While assembling the cake I actually felt guilty about making something so indulgent. Why is it that I wasn't satisfied to make a really good simple chocolate dessert, but instead I really wanted a chocolate treat that was impressive with a wow factor? Allow me to go on a tangent for a moment. Why is it as a culture, that we are so over indulgent? Especially as Americans we think that if something is good more must be better. Why is it that we are not content and must always look to attain or create something bigger and better and prettier than before even if the previous item was perfectly good? Excitedly we buy a home and within a few years are eager to get a bigger and newer one in a better neighborhood. It is not only homes, but cars, clothing, home decor even relationships. It is the grass is greener on the other side mentality.

While living in Italy the past two years, I have learned to live without some things that I always thought I needed. This may be a silly example, but we don't have an icemaker in our freezer. It is almost unheard of in my circle of family and friends in the states not to have an icemaker. That is a simple example of how we think we need things that we really don't. Please don't think I am being judgmental. I am the one that made this insanely indulgent dessert so I am preaching to the choir on this one. I really don't think that it is necessarily a sin to bake scrumptious treats, but it did cause me to step back and think about what I was doing and how our society as a whole has become so indulgent.

This past Saturday, we served alongside another family in a local soup kitchen here in Sicily.  Every day except Tuesday volunteers collect food from the local market and cook lunch for about 20-40 homeless and poor people.  It was humbling to serve with such selfless people that dedicate their time and energy to care for others on a regular basis.  Seeing others in need makes me thankful for the life I have and reminds me not take for granted all the comforts and blessings in my life.

Please don't misunderstand what I am saying, I am not condemning occasional indulgences in food or things, but the obsession to constantly upgrade really gets out of hand.  I am currently doing a bible study on the book of Daniel.  Daniel was living in Babylon under King Nebuchadnezzar.  If you watch Veggie Tales he was the one that created the chocolate bunny and ordered Larry and Bob to worship it.  Anyway, Nebuchadnezzar was content and prosperous with his life.  He took the credit for his success instead of realizing that the Lord is the one that gave him the ability to rule the nation and have such success.  It is the Lord that sets up kings and governments and also takes them down if he chooses.  Ultimately Nebbie learned his lesson and realized that the Most High God was the one responsible for his success, but that realization came only after becoming insane and spending seven years wandering in a field as an animal.  After regaining his sanity he finally gave God the glory for his life.  The point I am making is that I have to be careful not to get sucked into the mentally that bigger is always better and that I should remember at all times who allows me to have such blessings.   God is not against possessions and enjoying the good things in life.  There were many rich people in the bible that followed Jesus and used their wealth for his glory.  He blesses many with wealth and others he chooses to bless in other ways.  Regardless, he promises to supply all our needs according to his riches and glory for those who in Christ Jesus.  So we can be assured we will be taken care of.  It may not be in a big house with a Beemer parked in the garage, but it is according to his individual plan for our lives, and if we are striving to please Him we can be content with that.

Ok, so now I am off the tangent and should really give you the recipe to this yummy dessert.  If I haven't made you feel too guilty, I would encourage you to make this for your next special occasion or event where you can share it with others.  It makes such a big cake and if you are like me you definitely don't want this temptation sitting around your house.

You can find the original recipe here.


Here's what you'll need for this cake:
2 brownie layers- I used a Duncan Hines mix
2 cheesecake layers- I used the cheesecake recipe below
2 chocolate chip cookie layers-I used my recipe. You can find it here.
5 graham crackers (this is one of the 'cake' layers)
1 recipe for marshmallow frosting- see below
1 recipe for chocolate Frosting-see below (You can also use a store bought icing)

Fat girl used 3-9 inch pans. I used 8 inch because that is what I had on hand, but I definitely think 9 inch would be better and would make the cake much easier to cut since the layers wouldn't be quite as thick. I also lined each pan with parchment paper and then sprayed the paper with cooking spray.

Fat girl says, "In case your brownies or cookie get slightly crispy, it's ok. The frosting around the cake will help soften them back up as it refrigerates and sits. Let this cake refrigerate for at least 1 day before serving for maximum flavor results."

Step 1

Mix brownie according to directions on the box. Place parchment paper in bottom of pan and then spray with cooking spray. Pour half of the batter in two cake pans and bake until done making sure to not over bake.

Step 2

Cheesecake
1 1/4 pounds cream cheese (20 oz), room temperature
1 cup sugar
1 tsp vanilla extract
3 large eggs
1/2 cup sour cream

Preheat oven to 425 degrees. Using an electric mixer, beat cream cheese on medium until fluffy, scraping down side of bowl. Gradually add sugar, beating until fluffy. Beat in vanilla extract. Beat in eggs, one at a time, scraping down side of bowl after each addition. Beat in sour cream.

Put a piece of parchment paper on the bottom of a springform pan, spray with non stick spray. Pour half of the filling in each pan Bake for 15 minutes, then turn the oven temp down to 325 and bake for an additional 45 minutes.

Remove pan from oven, let cool 20 minutes. Run a knife around edge of the pans to loosen from the sides; let cool completely. Cover with plastic wrap and freeze until ready to use.

Step 3

Chocolate Chip Cookie

I used my favorite chocolate chip cookie recipe , spread half of the batch in each cake pan and bake at 350 for 12 minutes, until it's slightly golden. Not TOO golden or the cookie will be crispy, and you want a soft cookie in the cake.

Chocolate Frosting


Ingredients
6 ounces unsweetened chocolate, melted and cooled (I let it cool about 1 hour, stirring occasionally)
4 1/2 cups powdered sugar (no need to sift)
3 sticks (12 ounces) unsalted butter, at room temperature
6 Tbsp milk
1 Tbsp vanilla extract

Directions
Place all of the ingredients in a food processor and pulse to incorporate. Process until the frosting is smooth. (I didn't use a food processor. I mixed it in my KitchenAid, but would suggest a food processor if you have one).

Marshmallow Filling


1 jar (7 oz) marshmallow fluff
1 stick butter, room temperature
1 cup powdered sugar
1 tbsp vanilla extract

To make the butter cream, beat together the marshmallow fluff and butter, on medium speed, until the mixture is smooth and fluffy, about 3 minutes.

Reduce the speed to low, add the powdered sugar and vanilla, and beat for another minute. Increase speed to medium and beat for another 3 minutes until it's light and fluffy.

Assembly
Place one layer of brownie on a cake stand. Frost brownie with marshmallow frosting. Place a cookie layer on the marshmallow filling. Spread cookie layer with marshmallow frosting.

Remove cheesecake from freezer, unwrap, and remove from metal bottom of the pan from each piece, then peel off parchment paper.

Place cheesecake layer on top of the marshmallow frosting.

Spread a layer of chocolate frosting on cheesecake. Layer graham crackers on the cheesecake. You'll have to break up the crackers to make them fit. Spread chocolate frosting on grahams, then place the second layer of cheesecake on the chocolate frosting. Spread cheesecake with marshmallow frosting

Then place the remaining cookie on the frosting. Spread the cookie with marshmallow frosting and put the remaining brownie on the marshmallow frosting. Spread the remaining chocolate fudge frosting on top of the cake and on the side.

Refrigerate until ready to serve. Remove from the fridge about an hour before serving to help it come to room temperature slightly. Because this cake is SO dense, when it chills, it gets even denser and takes a little muscle to cut.  This cake is best if it is allowed to refrigerate overnight.

Here are a couple of photos of my cake. You will notice that my cake is not near as pretty as the original cake and my photography skills stink compared to Fat Girl's. Her icing is darker and I think that is because she mixed her icing in the food processor.  The KitchenAid mixer wasn't able to completely mix in all the melted chocolate leaving some of the chocolate on the sides of the bowl. This cake is definitely worth the time and effort!!


Buon Appetito!!

Saturday, September 17, 2011

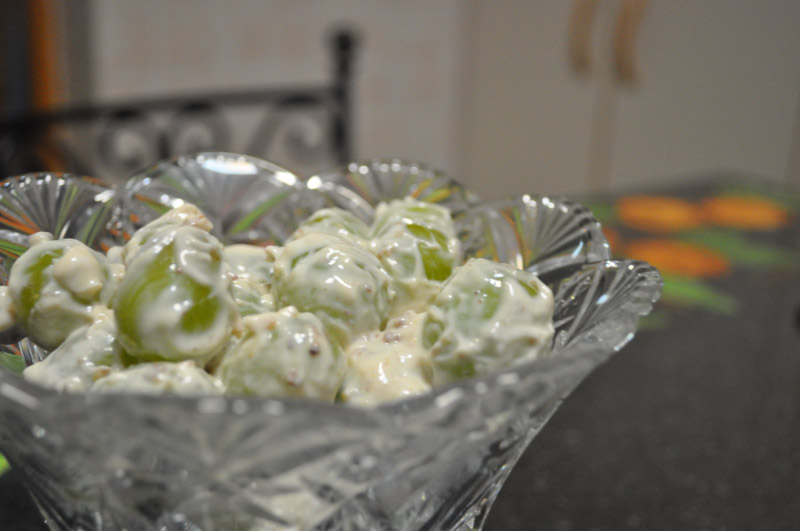
Green Grape Salad

I don't have an interesting story to go with this recipe, but just wanted to share this easy delicious salad. It makes a great dessert too! Use light cream cheese and sour cream for a low fat treat!


Green Grape Salad 
prep: 15 minutes
servings 8

4 pounds seedless green grapes
1 (8 ounce) package cream cheese
1 (8 ounce) container sour cream
1/2 cup white sugar
1 teaspoon vanilla extract
4 ounces chopped pecans
2 tablespoon brown sugar

Wash and dry grapes. In a large bowl, mix together the cream cheese, sour cream, sugar, and vanilla. Add grapes and mix until evenly incorporated. Sprinkle with brown sugar and pecans, mix again and refrigerate until serving.


Saturday, September 10, 2011

Fried Okra Salad


Fried okra, or okry as I have heard it pronounced in the deep south, is a southern classic. It is one of my mom's favorite foods so we ate quite a lot of it growing up. There are other ways to prepare okra besides frying. It is delicious added to gumbo, stewed with tomatoes, or pickled.  But in my opinion, it is best fried! By now I am sure you know that I often alter recipes to make them healthier when possible. I have tried baking okra instead of deep frying, but it didn't turn out well. So I just enjoy this delicious veggie in moderation without any guilt.

I came across this recipe in a Paula Deen magazine and thought it sounded interesting. The sweet and sour dressing is so yummy with the okra. Even people who don't normally like fried okra really enjoy this salad.

Buon Appetito!


Fried Okra Salad
serves 6

1 ½ pound breaded frozen okra
Vegetable oil for frying
2 large tomatoes, seeded and chopped
½ green bell pepper, diced
1 bunch green onions, diced
6 slices bacon, cooked and crumbled
½ cup vegetable oil (I like to use olive oil)
¼ cup sugar
¼ cup distilled white vinegar

Fry okra in vegetable oil according to package directions: drain on paper towels.
In a medium bowl, combine okra, tomatoes, bell pepper, green onions, and bacon.
In a small saucepan, combine oil, sugar, and vinegar. Cook over medium heat, stirring frequently, until sugar dissolves. Pour over okra mixture, tossing gently to coat. Serve immediately.

Sunday, August 28, 2011

Banana Foster Ice-Cream Pastry


I have always thought that banana foster looked delicious. Many of the recipes I have seen for this dessert call for dark rum and sometimes banana liqueur to be added and then lit on fire. I am sure it makes for an impressive display. The only problem is that I don't keep rum or banana liqueur on hand and am too cheap to buy it for an occasional recipe. When I saw this recipe in Southern Living magazine I knew I had to try it since it didn't call for alcohol. I have had the recipe for a long time just waiting for the perfect time to make it since it needs to be made and eaten immediately.

We are going to Ireland with some friends this week and at one of our planning meetings I made this dessert. I am not really into planning trips. I just want someone to tell me when and where to show up, and I will be there. I thought that my contribution to the meeting could be some yummy dessert. Everyone loved it! Southern Living seldom disappoints and this is no exception.


Banana Foster Ice Cream Pastry
Source: Southern Living Magazine September 2008
Serves 4

½ cup chopped pecans
½ (17.3 oz.) package frozen puff pastry sheets, thawed*
Parchment Paper
¼ cup butter
½ cup firmly packed brown sugar
1 T. orange juice
1 tsp. vanilla extract
½ tsp. ground cinnamon
Pinch of salt
4 bananas, cut into 1/3-inch-thick slices
Vanilla ice cream  

1.       Preheat oven to 350°. Bake pecans in a single layer in a shallow pan 8 to 10 minutes or until toasted and fragrant, stirring after 5 minutes. Remove from oven, and increase oven temperature to 400°.
2.       Unfold 1 puff pastry sheet on a lightly floured surface. Roll into a 10-inch square, carefully smoothing creases. Cut into 4 (4 to 5 inch) circles using a cutter. Place on a parchment paper-lined baking sheet.
3.       Bake at 400° for 10 to 15 minutes or until golden brown and puffed.
4.       Heat butter and sugar in large nonstick skillet over low. Heat 2 minutes or until sugar is melted. Add orange juice, next 3 ingredients, and 1 Tbsp. water to skillet. Cook, whisking constantly, 2 minutes or until mixture is blended and smooth. Add bananas, and cook 1 minute.
5.       Arrange pastry rounds on serving plates. Top each with about ½ cup banana mixture and ½ cup ice cream. Drizzle with any remaining sauce. Sprinkle with toasted pecans, and serve immediately.
*Frozen puff pastry shells may be substituted for frozen puff pastry sheets.


Friday, August 26, 2011

Mrs. Patsy's Chicken Salad


This southern girl loves some chicken salad, but I don't love how traditional chicken salad recipes are loaded with fat. Mayonnaise is very fattening and when paired with a buttery croissant, a chicken salad sandwich can sabotage a healthy diet. Speaking of croissants, have you ever cooked or watched someone make them? If you have, I am sure you were as shocked as I was at the amount of butter used. Croissants look so light, fluffy, and totally innocent, but a 3 oz. croissant has 270 calories and 17 grams of fat! I assure you that the law of conservation of matter which states, "mass cannot be created or destroyed", applies to croissants. All that butter goes somewhere, and for me, it’s "through the lips, straight to the hips". 

Never fear! You can still enjoy delicious chicken salad without the guilt. Here are a few tips on how to make traditional chicken salad healthier.
  • White meat contains less fast than dark meat, so try using white meat instead.
  • Use light mayo. It has 1/2 the fat of regular mayo.
  • Adding fresh fruit like grapes or pineapple to chicken salad adds bulk and flavor with no fat.
  • Dried fruit, like raisins or craisins, are good options as well, but are higher in calories than fresh fruit.
  • Add nuts for extra protein, fiber, and antioxidants. Nuts are high in fat so be careful about how much you add.
  • Eliminate the bread and serve on a bed of lettuce instead. You can cut approximately 250 calories by simply substituting lettuce for the bread.
  • If you really want bread, try pita bread (my favorite way to eat chicken salad) or a low fat flat bread, but beware of flat bread. It looks healthy but can pack as much as 9 grams of fat per piece!
This recipe is from my bff's mom, Mrs. Patsy. I got this recipe from her about 15 years ago, and it is still my favorite chicken salad recipe. It is perfect for summertime, and I like to serve it when I have friends over for lunch. Every time I make it, I have requests for the recipe. I hope you enjoy it as much as I do!

Buon Appetito!

Mrs. Patsy's Chicken Salad
2 1/2 cups cooked chicken
1 cup chopped celery
1 cup green grapes, halved
2 T. fresh parsley
1/2 cup mayo
1 T. lemon juice
1T. cider vinegar
1 1/2 T. mustard
1/2 tsp. sugar
1/2 tsp. salt
1/8 tsp. pepper

Mix together. Chill. If you like your salad wetter simply add more of the last 7 ingredients.